Key Takeaways
- Over 60% of U.S. basements have a moisture problem, yet most homeowners don’t act until water is already pooling on the floor.
- The wall/floor seam is the primary entry point for water, along with cracks, porous cinder blocks, and hydrostatic pressure through floors.
- Interior waterproofing (drain tile systems, sump pumps, crack repair) is generally cheaper, less disruptive, and can be completed year-round.
- Exterior waterproofing involves digging next to the exterior foundation, placing a vapor barrier, a drain tile, and 6A round stone, and is best for finished basements.
- In 2026, the national average cost for professional basement waterproofing is approximately $5,228, with interior systems ranging from $3,000 to $8,000 and exterior systems from $8,000 to $20,000.
- DIY paint-on sealers and hydraulic cement are temporary fixes that fail under hydrostatic pressure. Professional drain tile systems and polyurethane crack injection offer long-term, reliable solutions.
- Most basement waterproofing companies offers free inspections, easy financing options, low-interest payments, and no money down.
Sixty percent of U.S. basements have a moisture problem. Most homeowners don’t discover it during a dry summer afternoon. They find it during a heavy rainstorm or after a spring thaw, when water is already pooling on the floor or seeping through the walls. By that point, the damage has often been building for months or even years.
This guide covers everything you need to know about how to waterproof a basement, from identifying the root cause of the leak to choosing the right solution and understanding what it will cost.
Why Is There Water in My Basement
Before waterproofing, you must understand how water gets into your basement. Basement leaks usually occur when water accumulates around the foundation and finds pathways into the structure, whether because of drainage problems outside the home or weaknesses in the foundation itself.
Common Causes of Basement Water Problems
Heavy rain and melted snow exacerbate these issues, leading to water seeping through cracks or leaks in the foundation. This causes warped floorboards, rusted appliances, and dampness throughout the space.
- Hydrostatic pressure: Water is heavy and pushes outwards in all directions. As water seeps into the soil around your foundation, hydrostatic pressure builds up as the water looks for someplace to go. As the water presses up against your foundation, it makes its way into any small cracks it can find, or even forms new ones, and eventually seeps into your basement through the wall/floor seam or porous cinder blocks.
- The clay bowl effect: When your home was built, dense soil was dug out of the ground to create a large hole for the foundation and the basement. After construction, any extra space outside your foundation walls was filled with some of the dug-up soil. But this dug-up soil, called backfill, is looser and more porous than the original dense soil. So when it rains, the rainwater seeps into the porous backfill and not into the more dense surrounding soil. This means the water seeps into the ground surrounding your home’s foundation, up against your basement walls, creating the “clay bowl effect.”
- Poor drainage: If the yard around your home’s foundation isn’t graded properly, water may be collecting around your home’s foundation. The collected water seeps into the ground and, because of hydrostatic pressure, eventually through your foundation walls and into your basement. Inadequate or clogged gutters and downspouts can also dump water straight down into the soil surrounding your basement.
- Foundation cracks: As the water in the soil presses up against your home’s foundation, it searches for any entry. Cracks in your basement walls or floors provide a pathway for water to squeeze through. Cinder blocks are porous and allow dampness, making them a valid water entry point even without visible cracks.
- Cooling ducts: Cooling ducts can be a source of water and moisture in basements that many homeowners overlook. Condensation forming on or around cooling ductwork contributes to moisture buildup over time.
- A failing waterproofing system: A poorly installed or maintained basement waterproofing system can lead to basement water. If your basement waterproofing system was improperly installed, it won’t function properly and will fail to remove basement water. Properly installed but poorly maintained waterproofing systems can also fail as the sump pump wears out or drain tiles clog.
Signs Your Basement Needs Waterproofing
Many basement moisture problems start with subtle warning signs. Catching these early helps prevent larger repairs later. Water problems are often easiest to identify during or immediately after heavy rainfall, when groundwater levels and drainage issues are most visible.
- Damp or wet spots on walls or floors: Visible moisture on the walls or floor is the most obvious sign. Pay attention to the wall/floor seam, as this is the primary weak area where water enters.
- Efflorescence: White, powdery mineral deposits on walls are a sign that water has been moving through the concrete. The water carries minerals to the surface as it evaporates, leaving behind a white residue.
- Musty odors: A persistent musty smell in the basement is a reliable indicator of moisture, even if no visible water is present.
- Peeling paint or wallpaper: Moisture behind walls causes paint and wallpaper to bubble, peel, or blister.
- Swollen doors and window frames: Wood expands when it absorbs moisture. Sticking doors and windows in the basement or on the floors above can indicate moisture intrusion.
- Warped or rotting wood: Moisture causes wood to warp and rot. Check floor joists, beams, and any wood framing in the basement.
- Cracks in drywall, sticking doors, and floors dipping towards the outside: These are signs of foundation failure that go beyond simple moisture intrusion. If you notice floors dipping towards the outside, gaps between floors and trim, or cracks in drywall or brick, the foundation itself may be compromised.
- Rust on nails or metal appliances: Rust on nails or screws in the basement walls, or on the bottom of metal appliances in your basement, indicates water has been present for some time.
How To Identify Water Entry Points
Look for the specific areas where water is entering your basement. By pinpointing these spots, you can target your waterproofing efforts and address the root causes of the moisture. The wall/floor seam is the primary weak area. Water entry points include cracks, the wall/floor seam, porous cinder blocks, and hydrostatic pressure through floors. Beyond these, water can also enter through gaps around windows or doors, penetrations for pipes or utilities, and poorly sealed sump pump pits.
Basement Waterproofing Methods
There are many ways to waterproof your basement and reduce the risk of water damage. Professional waterproofing contractors evaluate problems like engineers, not salesmen, focusing on finding and fixing the root cause. The right method depends on the severity of the problem, the type of foundation, and whether the basement is finished or unfinished.
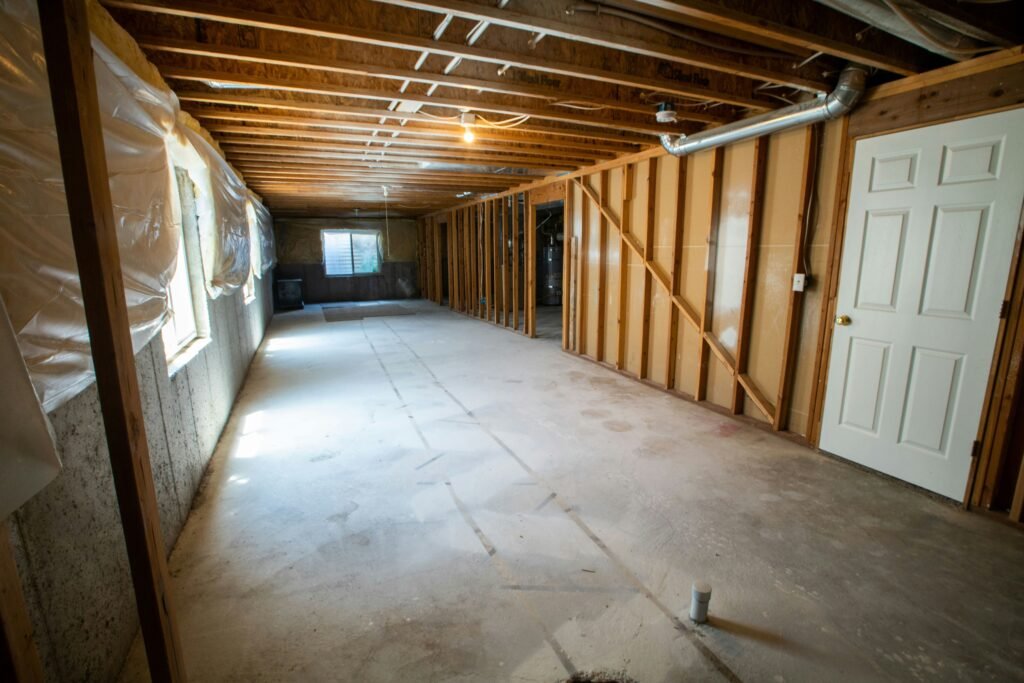
Interior Waterproofing
Interior waterproofing is generally cheaper, less messy, and less disruptive to landscaping than exterior methods. These techniques focus on managing water entering your basement and preventing further moisture intrusion. Interior work can be completed year-round, even during harsh winters, which is a meaningful advantage over exterior excavation.
Interior Drain Tile Systems
If water repeatedly enters the basement despite exterior improvements, you may need to install an interior drainage system to effectively manage water accumulation and direct it away from your basement.
This process involves cutting a narrow trench around the inside edge of the slab and placing a perforated pipe inside a bed of gravel. As groundwater seeps into the trench, the pipe collects the water and directs it to a sump pump basin. The sump pump then removes the water from the basement and discharges it outside, away from the foundation. A sump pump is always included with drain tile installation, so there is no need to budget for it separately.
Interior drainage systems work with physics rather than against it. Most importantly, however, these systems relieve hydrostatic pressure by capturing the water and pumping it away. Barrier methods alone are far more prone to failure over time.
Sump Pumps
A sump pump sits in a basin called a sump pit, installed at the lowest point of the basement floor. As water collects in the pit, a float switch activates the pump, which pushes the water through a discharge pipe and away from the home’s foundation.
There are a few types of sump pumps available, each designed for different situations.
| Sump Pump Type | Description | Best For |
| Submersible | Sits inside the sump pit and operates underwater | Homes with frequent water intrusion |
| Pedestal | Motor mounted above the pit, pump at the base | Easier maintenance, lower cost |
| Battery backup | Provides protection during power outages | All homes, especially in storm-prone areas |
| Water-powered | Relies on municipal water pressure | Homes connected to city water |
Submersible pumps: These pumps sit inside the sump pit and operate underwater. They are typically quieter and more powerful than other models, making them a good choice for homes that experience frequent water intrusion.
Pedestal pumps: Pedestal pumps have a motor mounted above the sump pit with the pump at the base. Because the motor stays dry, they are easier to access for maintenance and are often less expensive, though they can be noisier during operation.
Battery backup pumps: These systems provide protection during power outages. If the main pump loses electricity during a storm, the backup battery allows the system to continue removing water for hours. Given storm season, a battery backup pump is a wise investment.
Water-powered pumps: Water-powered pumps rely on municipal water pressure rather than electricity. They can operate during extended power outages, but are typically only suitable for homes connected to city water.
Crack Repair
Horizontal, stair-step, growing, or leaking cracks are red flags that require professional attention. Epoxy or polyurethane foam are short-term fixes that can fail with continued wall movement. For long-term or larger/leaking cracks, a PVC patch is installed to redirect water to a drainage system.
A vapor barrier may be added to interior walls if the customer wants it, for example if there are multiple leaking cracks or plans to finish the basement. We do not recommend waterproof coating on interior walls. A sealer is only applied to exterior walls as part of an exterior waterproofing process.
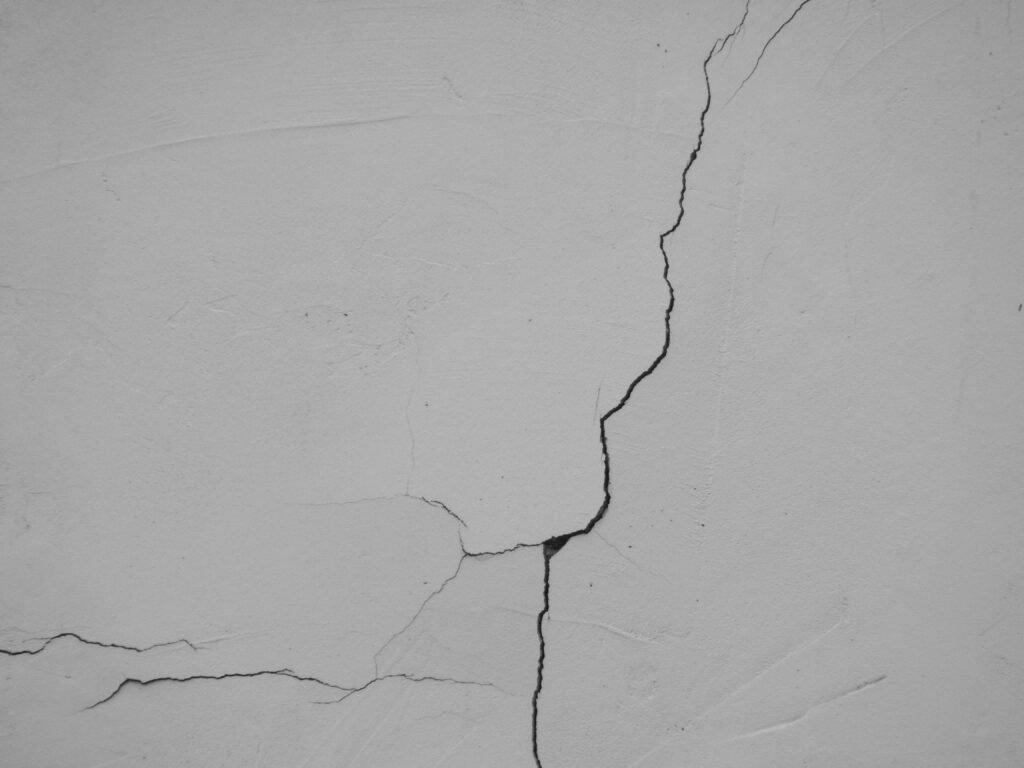
Types of Foundation Cracks
Not all foundation cracks are equal. The type of crack tells a story about what is happening to your foundation & basement, and the appropriate repair method depends on the crack type.
| Crack Type | Appearance | Common Cause | Severity |
| Vertical | Runs up and down | Concrete shrinkage, settlement | Low to moderate |
| Horizontal | Runs parallel to the floor | Hydrostatic pressure, soil pressure | High |
| Stair-step | Diagonal along mortar joints | Moisture, settlement (block/brick walls) | Moderate to high |
| Hairline | Very thin, surface-level | Normal concrete curing | Low |
- Vertical cracks: Vertical cracks run up and down and are often tied to foundation settling. If the crack widens at the top or bottom, that suggests the wall is settling or heaving. Vertical cracks are generally less structurally concerning than horizontal cracks, yet they still allow water to enter and should be addressed.
- Horizontal cracks: A horizontal crack runs straight across the wall face, parallel to the floor. Horizontal cracks indicate a shearing wall, which requires steel beams. They are often linked to hydrostatic pressure and wall movement. Horizontal cracks are the most serious type of foundation crack and should never be ignored.
- Stair-step cracks: Stair-step cracks usually appear in concrete block or brick foundations and look like diagonal cracking that follows mortar joints. They are often caused by moisture issues and excessive pressure on one part of the wall. Stair-step cracks are common in block foundations and require professional assessment.
- Hairline cracks: Hairline cracks are very thin, surface-level cracks that often result from normal concrete curing. They are generally low-severity, but can allow moisture to seep through over time.
Exterior Waterproofing
Exterior waterproofing is often the first line of defense against basement moisture issues. It is more likely needed for a finished basement. Interior work on a finished basement may require moving items and refinishing, which can push the total cost higher.
The process involves digging next to the exterior foundation, placing a vapor barrier, a drain tile, and 6A round stone. A sealer is applied to exterior walls as part of this process. A vapor barrier replaces the interior PVC panel; the footer is wrapped with the patch for crack repairs. Each plan of repair may be slightly different, but it will be very similar to this description.
Exterior waterproofing is the more invasive option and requires excavation around the perimeter of the home. This can disrupt landscaping, driveways, and any walkways near the foundation. It is generally best reserved for finished basements, new construction, or major renovations where the ground is already being disturbed.
Comparing Interior vs. Exterior Waterproofing
| Feature | Interior Waterproofing | Exterior Waterproofing |
| Cost | $3,000 to $8,000 | $8,000 to $20,000 |
| Installation time | 1 to 3 days | 5 to 10 days |
| Landscape disruption | None | Extensive excavation |
| Best timing | Year-round | Spring/summer only |
| Best for | Unfinished basements, budget-conscious | Finished basements, new construction |
Foundation Repair Solutions
If your foundation has suffered damage, waterproofing alone may not be enough. Our customized repair plans are designed to restore your foundation’s stability and give you long-term peace of mind. Consult a professional for a thorough inspection to identify the root cause of the issue, not a surface-level assessment.
Settling Foundations
A settling foundation is one that has sunk or shifted. The result is typically uneven floors, sticking doors and windows, and cracks in drywall or brick. Signs of foundation failure include sticking windows and doors, floors dipping towards the outside, cracks in drywall or brick or foundation, and gaps between floors and trim.
Helical piers are the preferred solution for settling foundations. They provide lift when placed outside or excavated and can be done inside. Helical piers are screwed into the ground like a giant screw. They provide stable, long-lasting support for the foundation.
Bowing Walls
Bowing walls are a serious structural issue caused by hydrostatic pressure, soil pressure, or tree roots pushing against the foundation. Tree roots are more likely to cause bowing wall issues than uneven floors.
Carbon fiber straps and wall braces: Carbon fiber straps and wall braces are used for bowing walls, not for cracking alone. They provide stabilization and prevent further inward movement only. They do not straighten walls and do not prevent future cracks. Bowing under two inches typically requires carbon fiber.
Waler wall braces: Waler wall braces can straighten walls in some cases, unlike carbon fiber straps, which only stabilize. This is an important distinction for homeowners dealing with significant bowing.
Steel beams: Bowing more than two inches will most likely require steel beams. Horizontal cracks that indicate a shearing wall also require steel beams.
Helical tie-back: A helical tie-back solution is an additional option for bowing walls. Helical tie-backs are anchored into stable soil outside the foundation. They provide lateral support to prevent further inward movement.
Uneven Floors
Uneven floors are usually caused by improper support below. Repairs typically involve support posts, beams, or floor joist work. They can be caused by poor construction, moisture or water causing settlement or rusting of support posts, deterioration of lumber (beams or floor joists), or improper supports (rocks, bricks, lumber, etc.).
The Cost of Basement Waterproofing in 2026
Basement waterproofing costs vary depending on the size of the basement and the type of repair needed. Minor sealing treatments are usually the most affordable options, whereas drainage systems and mechanical solutions tend to cost more because they require excavation or professional installation.
In 2026, the national average for professional basement waterproofing is approximately $5,228. Most homeowners pay somewhere between $2,461 and $8,198, depending on the waterproofing method, the extent of the issue, and the size of the home. Minor interior fixes, like sealing foundation cracks, may cost as little as $600, while installing a complete system can total as much as $15,000.
Cost by Basement Size
| Basement size (sq. ft.) | Average cost to waterproof |
| 500 | $1,500 to $5,000 |
| 750 | $2,300 to $7,500 |
| 1,000 | $3,000 to $10,000 |
| 1,250 | $3,800 to $12,500 |
| 1,500 | $4,500 to $15,000 |
| 2,000 | $6,000 to $20,000 |
Cost by Method
| Method | Cost range | Duration |
| DIY sealer paint | $50 to $300 | 3 to 5 years |
| Crack injection | $400 to $1,000 per crack | 10 to 25 years |
| Interior drainage system | $4,000 to $12,000 | Lifetime |
| Exterior membrane | $8,000 to $20,000 | 20 to 30 years |
What Affects Waterproofing Costs
Size: The cost to waterproof a basement falls between $3 and $10 per square foot on average. Large spaces require more time, more labor, and more materials to waterproof than small spaces.
Foundation material: Poured concrete basements may cost less to waterproof than block wall foundations. This cost difference is because poured concrete is seamless and less prone to water leakage because of the lack of mortar joints.
Soil conditions: Heavy clay soils and freeze-thaw cycles can add 10% to 20% to costs because of the need for more robust systems.
Condition of foundation: If the water problems on your property have left you with damage and a foundation that’s in poor condition, you might need to budget for repairs before implementing the more preventative waterproofing methods.
Labor: The cost to hire a basement waterproofing contractor is around $200 per hour. Labor is likely the biggest cost driver, especially because many methods require excavation, which is labor- and time-intensive.
DIY vs. Professional Basement Waterproofing
While you can handle some minor tasks like cleaning gutters and extending downspouts, professional waterproofing expertise is recommended for severe water intrusion, extensive foundation cracks, and installing drainage systems.
When DIY Might Work
DIY might work if you have a single hairline crack with no active seepage, general dampness with no standing water, or exterior drainage issues that haven’t yet caused interior water intrusion. In these cases, cleaning gutters, extending downspouts, and improving yard grading can make a meaningful difference.
When To Call a Professional
Stop DIY and call a professional if water returns after 2 or more DIY attempts, if there are multiple cracks with active seepage, if there are horizontal cracks or wall bowing (structural), if water is pooling on the floor within 1 hour of rain, if you are planning to finish the basement (higher damage stakes), or if you are selling your home within 2 years (a transferable warranty adds value).
Why DIY Products Often Fail
DIY paint-on sealers and hydraulic cement are often temporary fixes that fail under hydrostatic pressure. DRYLOK and similar paint-on sealers work reasonably well for minor dampness where there is no active water pressure. Under hydrostatic pressure, though, these coatings usually bubble and peel within 2 to 3 years, with a success rate of only about 40% when applied to walls with active leaks.
Hydraulic cement is excellent for plugging a specific hole, like around a pipe penetration, because it expands as it dries. It is rigid, though. Because foundations move and settle slightly with seasonal changes, rigid patches eventually crack loose. For active cracks in walls, hydraulic cement has a long-term success rate of only 20% to 30%.
Professional methods, such as interior drain tile systems and polyurethane crack injection, offer long-term, reliable solutions. Polyurethane foam expands to fill the entire depth of the crack, well below the surface, and remains flexible. This allows it to move with the foundation without breaking the seal.
Step-by-Step Guide to Waterproofing Your Basement
Whether you are tackling minor moisture issues yourself or preparing for a professional waterproofing project, understanding the process helps you make informed decisions.
Step 1: Inspect Your Basement
Inspect your basement during or after heavy rain, when groundwater levels and drainage issues are most visible. Check the exterior foundation walls for cracks or signs of deterioration. Inspect the interior walls and floors for water stains, dampness, or efflorescence. Examine the ceiling for water spots or sagging areas. Look for moisture in corners and hidden spaces. Test the humidity levels using a reliable hygrometer.
Step 2: Address Exterior Drainage Issues
Before any interior work, address exterior drainage issues. Improve yard grading so the ground slopes away from the foundation. Clean gutters and install quality leaf guards to prevent clogs. Extend downspouts at least 15 feet away from the foundation. Underground drainage pipes can carry water even further from your home.
Step 3: Identify and Repair Cracks
Identify the type and severity of any cracks. Hairline cracks with no active seepage can be sealed with polyurethane or epoxy filler. Larger cracks, horizontal cracks, or cracks with active seepage require professional assessment and repair. For long-term crack repairs, a PVC patch is installed to redirect water to a drainage system.
Step 4: Install an Interior Drainage System
If water repeatedly enters the basement despite exterior improvements, install an interior drainage system. This process involves cutting a narrow trench around the inside edge of the slab. A perforated pipe is placed inside a bed of gravel, and the pipe connects to a sump pump basin. A sump pump is always included with drain tile installation, so there is no need to budget for it separately.
Step 5: Consider Exterior Waterproofing
For finished basements or severe water intrusion, exterior waterproofing may be necessary. This involves digging next to the exterior foundation, placing a vapor barrier, a drain tile, and 6A round stone. Each plan of repair may be slightly different, but the approach will be very similar to this description.
Step 6: Maintain Your System
Both interior and exterior waterproofing systems require ongoing maintenance to perform effectively over time. Check sump pumps regularly, clean drainage systems, and monitor humidity levels. Sump pumps are especially worth checking before spring thaw and storm season, when demand on the system peaks.
Basement Waterproofing FAQs
How long does basement waterproofing last?
The lifespan of a basement waterproofing system depends on the method used. Interior drainage systems can last a lifetime with proper maintenance. Exterior membranes typically last 20 to 30 years. DIY paint-on sealers last only three to five years.
Does homeowner’s insurance cover basement waterproofing?
You may be covered by your homeowner’s insurance, but always check with your provider. Standard insurance rarely covers gradual seepage, as it is considered a maintenance issue. Having a documented professional waterproofing system can sometimes reduce premiums by 5% to 10% because it lowers the risk of major water claims.
How do I know if I need interior or exterior waterproofing?
Interior waterproofing is generally the most practical and cost-effective choice for most existing homes. It involves no exterior excavation and no damage to your landscaping or decks. Exterior waterproofing is more likely needed for a finished basement or for homes with severe water intrusion. Our team provides a thorough inspection to identify the root cause of the issue and recommend the right solution.
Can I waterproof my basement myself?
DIY might work for minor surface seals with no flooding history. Up to 50% of DIY attempts at more serious waterproofing fail, though, often leading to more expensive repairs later. For persistent dampness, active seepage, or structural issues, professional waterproofing is the better investment.
What is the wall/floor seam and why does it matter?
The wall/floor seam is where the basement wall meets the floor. This is the primary weak area where water enters most basements. Hydrostatic pressure pushes water through this seam, which makes it the most common entry point for basement water intrusion. Interior drain tile systems are specifically designed to capture water at this point and direct it to a sump pump.
Do I need a sump pump?
A sump pump is always included with drain tile installation. If you have a basement, a sump pump is a wise investment regardless of whether you currently have water intrusion. Heavy rainfall and snowmelt create conditions where a sump pump can prevent significant water damage.
What causes bowing basement walls?
Bowing walls are caused by hydrostatic pressure, soil pressure, or tree roots pushing against the foundation. Tree roots are more likely to cause bowing wall issues than uneven floors. Bowing under two inches typically requires carbon fiber stabilization; more than two inches will most likely require steel beams.
Should I be worried about a plumbing leak in my basement?
Plumbing leaks must be dealt with by a plumber. Basement waterproofing addresses groundwater intrusion and hydrostatic pressure, not plumbing leaks. If you suspect a plumbing leak is contributing to moisture in your basement, contact a licensed plumber before proceeding with waterproofing.
How much does it cost to waterproof a basement?
In 2026, the national average for professional basement waterproofing is approximately $5,228. Heavy clay soils and freeze-thaw cycles can add 10% to 20% to costs because of the need for more robust systems. Basement waterproofing companies offer free inspections, easy financing options, low-interest payments, and no money down.
What is a helical pier and when is it used?
Helical piers are the preferred solution for settling foundations. They are screwed into the ground like a giant screw, providing stable, long-lasting support for the foundation. They provide lift when placed outside or excavated and can be done inside. Helical piers are used when a foundation has settled or shifted. The signs are typically uneven floors, sticking doors and windows, and cracks in drywall or brick.