Key Takeaways
- Identify the root cause: Effective crawlspace waterproofing starts with a thorough inspection to determine how water enters, whether through groundwater intrusion, poor drainage, or foundation issues.
- Interior drain tile systems: Installing an interior drain tile system alongside a reliable sump pump manages water accumulation and directs it away from your home.
- Crawlspace encapsulation: A heavy-duty moisture barrier seals out outside air and moisture, controls musty smells, and protects your home’s structural integrity.
- Avoid temporary fixes: Epoxy or polyurethane foam injections are short-term crack repairs. A permanent, engineering-minded approach provides long-term stability.
- Professional expertise matters: A qualified professional ensures your crawlspace is waterproofed correctly the first time.
Why Your Crawlspace Deserves More Attention Than It Gets
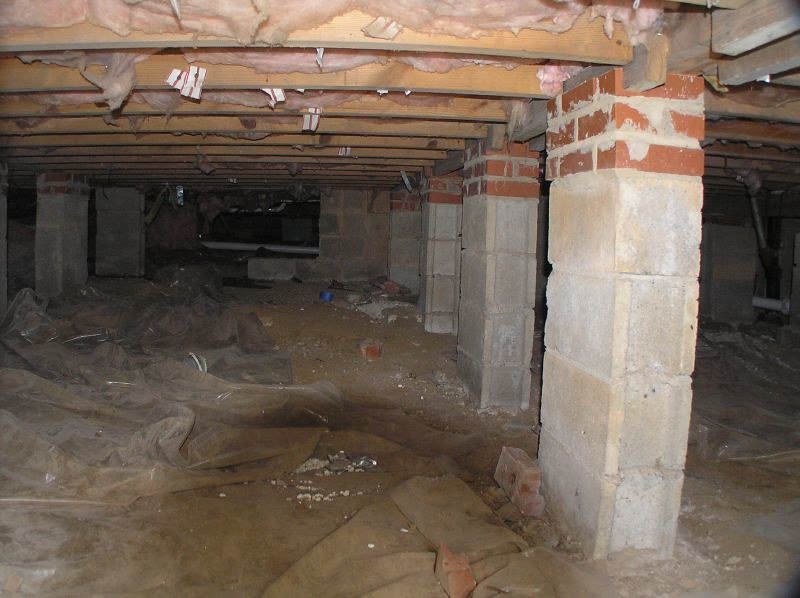
Most homeowners go years without setting foot in their crawlspace. That mindset often turns a minor moisture issue into a five-figure structural repair.
Your crawlspace houses your plumbing, supports your floor joists, and sits directly above the soil. Depending on your region, clay-heavy soils, high water tables, and seasonal freeze-thaw cycles can create constant ground movement that works against your foundation. Water finds the path of least resistance. For many homes, that path leads straight into the crawlspace.
Experienced foundation repair professionals have spent decades solving these exact problems across all types of climates and soil conditions. Homeowners who act early spend far less than those who wait. This guide walks you through everything you need to know about crawlspace waterproofing in 2026, from the first warning signs to the full waterproofing process. You can make an informed decision about your home.
What Is Crawlspace Waterproofing?
Crawlspace waterproofing is the process of managing and preventing moisture intrusion beneath your home. A complete waterproofing system addresses water entry from the ground, through the foundation walls, and from the air itself.
True waterproofing prevents water from entering in the first place, typically through exterior drainage systems and foundation membranes. Water management collects and redirects water that has already entered the space using interior drain tile systems and sump pumps. In practice, most homes benefit from both approaches working together.
Crawlspace encapsulation is a related but distinct process. It involves sealing the crawlspace with a heavy-duty moisture barrier to control humidity and prevent ground vapor from rising into the living areas above. Encapsulation is often paired with waterproofing. It serves a different primary function: moisture control rather than bulk water removal.
Signs Your Crawlspace Needs Waterproofing
Identifying the early warning signs of moisture intrusion saves you from extensive and costly repairs down the road. Some of these signs are obvious. Others are easy to dismiss until the damage becomes undeniable.
- Accumulated water or moisture: Standing water after heavy rain, or consistently damp soil beneath your home, points directly to a groundwater intrusion problem. Hydrostatic pressure, which is the force of groundwater pushing upward through floor joints and structural cracks, is a common culprit in areas with high water tables.
- Musty odors: High humidity in an enclosed space creates the conditions for wood decay and organic breakdown. Both produce a distinctive smell throughout the home, particularly on the ground floor.
- Structural shifts: Floors dipping towards the outside, sticking doors and windows, gaps between floors and trim, and cracks in drywall indicate foundation movement. Uneven floors are typically caused by poor construction, moisture causing settlement or rusting of support posts, deterioration of lumber, or improper supports such as rocks, bricks, or lumber used in place of proper footings.
- Wood decay: Soft or darkened wood on floor joists or support beams indicates prolonged moisture exposure. Once wood moisture content climbs above 19%, fungal decay sets in. Left unchecked, this compromises the load-bearing capacity of the structural elements supporting your floors.
- Sagging or warped floors: By the time floors visibly sag above the crawlspace, the underlying structural damage is already significant.
How Water Gets Into Your Crawlspace
Water does not simply appear in a crawlspace. It follows predictable paths, and each path requires a specific solution.
- Groundwater seepage: The water table rises or saturated soil pushes moisture through the foundation floor and walls. Seasonal snowmelt and heavy rainfall regularly raise the water table in many regions, making groundwater seepage a recurring concern for many homeowners.
- Poor exterior drainage: When the ground around your home slopes toward the foundation rather than away from it, every rain event directs water straight to your crawlspace. Clogged gutters and short downspouts compound the problem by dumping roof runoff directly at the foundation.
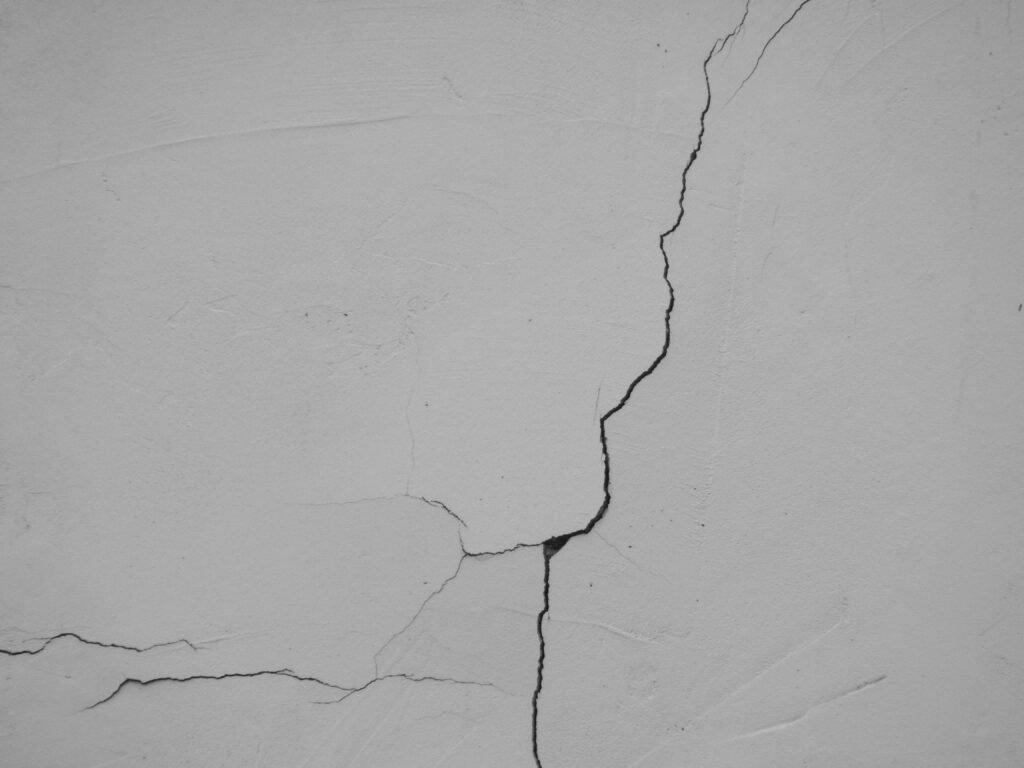
- Foundation wall cracks: Over time, concrete and cinder block foundations develop cracks from settling, hydrostatic pressure, and freeze-thaw cycles. Cinder blocks are porous by nature. Dampness can migrate through even intact block walls without a visible crack.
- Condensation: Warm, humid air enters the crawlspace through vents or gaps and contacts cooler surfaces. This is particularly common in summer months. It can deposit significant moisture on floor joists, ductwork, and the ground surface.
The Complete Crawlspace Waterproofing Process
A well-executed repair plan restores your foundation’s stability and gives you long-term peace of mind. The process is methodical. Each step builds on the last. Skipping steps, or applying a surface-level fix without addressing the root cause, causes waterproofing systems to fail prematurely.
Step One: Inspection
The process begins with a free, thorough inspection. An experienced technician evaluates the crawlspace for standing water, moisture staining, wood decay, structural damage, and the likely sources of water intrusion. The technician evaluates the exterior grading, the condition of gutters and downspouts, the foundation walls, and the floor structure above.
Without a proper diagnosis, any waterproofing work is guesswork. A thorough inspection identifies the root cause of the problem rather than treating the symptoms.
Step Two: Structural Repairs
Existing structural damage must be addressed before any waterproofing system is installed. Rotted floor joists cannot support a home, regardless of how well the crawlspace is waterproofed afterward. This phase may involve replacing damaged lumber, installing new support posts, repairing or replacing beams, and correcting improper supports.
Helical piers may be required to stabilize and potentially lift the structure if the foundation itself has settled. Helical piers provide reliable, long-term support and can be installed with minimal disruption.
Step Three: Interior Drain Tile System Installation
The interior drain tile system is the core of most crawlspace waterproofing solutions. Interior drain tile systems are installed to effectively manage water accumulation and direct it away from your home.
The installation process involves breaking up the concrete or compacted soil along the interior perimeter of the crawlspace. A trench is excavated. A perforated drain pipe is laid within it, surrounded by 6A round stone to facilitate drainage. A PVC panel or membrane is installed along the foundation wall to capture water seeping through the wall and direct it into the drain system. The trench is then covered, restoring the crawlspace floor.
This system captures groundwater before it pools in the crawlspace and channels it toward the sump pump basin.
Step Four: Sump Pump Installation
A sump pump is always included with drain tile installation. The drain tile system collects water from around the perimeter and directs it to a sump pump basin positioned at the lowest point of the crawlspace. The pump activates automatically when water reaches a set level. It pumps the water out and away from the home through a discharge line.
A battery backup system is strongly recommended. Power outages frequently coincide with the storms that cause the most water intrusion. Without a backup, the sump pump goes offline precisely when it is needed most.
Step Five: Crawlspace Encapsulation
Encapsulation seals the crawlspace environment once the water management system is in place. Crawlspace encapsulation involves installing a heavy-duty moisture barrier to seal out outside air and moisture. A proper encapsulation system uses a reinforced liner, typically 12 to 20 mil in thickness. It is laid across the entire crawlspace floor and extended up the foundation walls.
Seams are overlapped by at least 12 inches and sealed with specialized tape. The liner is mechanically fastened to the foundation walls. Any piers or columns within the crawlspace are wrapped to prevent moisture from wicking upward. Exterior vents are sealed to prevent humid outdoor air from entering the conditioned space.
Encapsulation helps with musty smells and ensures good indoor air quality by preventing ground moisture from evaporating into the space. It also reduces the load on your HVAC system, which no longer has to compensate for the humidity rising from below.
Step Six: Crawlspace Insulation
Insulation is the final layer of protection. It seals small openings along the sill plate and bond board to prevent exterior cold or hot air from entering. This maintains consistent temperatures within the crawlspace and prevents cold floors above in the winter. In colder climates, this step also protects pipes running through the crawlspace from freezing during winter months.
Decreased energy costs are a recognized benefit of crawlspace encapsulation and insulation. Your heating and cooling systems operate more efficiently by stabilizing the temperature and humidity in the space beneath your home.
Exterior Waterproofing
Interior systems manage water that has already entered or is actively entering the crawlspace. Exterior waterproofing prevents groundwater intrusion by addressing water before it reaches the foundation walls.
The exterior waterproofing process involves excavating along the outside of the foundation to expose the foundation walls. A vapor barrier is applied to the exterior wall surface, drain tile is installed at the footer level, and 6A round stone is placed around the pipe to facilitate drainage. Each plan of repair may be slightly different. It will be very similar to this description.
Exterior drainage is particularly effective for homes with finished crawlspaces or where interior work would be more disruptive. It is also the preferred approach when the foundation walls themselves are the primary source of water intrusion.
Proper exterior grading is a simpler but equally important measure. The ground around your home should slope away from the foundation at a minimum of 6 inches over the first 10 feet. Extending downspouts at least 4 to 6 feet from the foundation and keeping gutters clear of debris are low-cost steps that meaningfully reduce the volume of water reaching the crawlspace.
Crawlspace Waterproofing vs. Encapsulation
These two terms are often used interchangeably. They address different problems. Understanding the distinction helps homeowners make better decisions about what their specific situation requires.
| Feature | Waterproofing | Encapsulation |
| Primary goal | Remove and redirect bulk water | Control humidity and ground vapor |
| Key components | Interior drain tile, sump pump | Heavy-duty vapor barrier, sealed vents |
| Best for | Active water intrusion, standing water | Moisture control, musty odors, air quality |
| Typical cost | $3,000–$8,000+ | $5,000–$15,000+ |
| Often combined? | Yes, frequently paired together | Yes, frequently paired together |
Many homes need both. A crawlspace with standing water requires waterproofing first. Once the water is under control, encapsulation seals the environment and prevents the conditions from recurring.
DIY vs. Professional Crawlspace Waterproofing
Some homeowners attempt to address crawlspace moisture on their own. For minor issues, certain steps can be handled without professional help. Extending downspouts, regrading soil away from the foundation, and sealing small cracks with hydraulic cement are reasonable DIY measures.
Beyond those surface-level steps, crawlspace waterproofing is not a project well-suited to the average homeowner. Excavating interior drain tile trenches, installing sump pump basins, and properly sealing a vapor barrier across an irregular crawlspace floor all require experience, proper tools, and an understanding of how water behaves in a foundation environment.
A DIY approach that misdiagnoses the source of water intrusion can make the problem worse. Sealing a crawlspace without first addressing active water entry can trap moisture inside and accelerate the very decay you were trying to prevent.
Professional installation also comes with a warranty. Many professional contractors offer a limited lifetime warranty, ensuring the repair plan provides the long-lasting stability your home requires. That protection is not available with a DIY approach.
Crawlspace Waterproofing Costs in 2026
Cost is one of the first questions homeowners ask. Costs vary significantly based on the size of the crawlspace, the severity of the moisture problem, and the specific solutions required.
As a general reference, professional crawlspace encapsulation ranges from $5,000 to $15,000 for most residential projects, with an average around $5,500 for a standard-sized home. Interior drain tile installation typically adds $3,000 to $8,000 depending on the perimeter length and site conditions. Structural repairs, if needed, are priced separately.
Replacing rotted floor joists and support beams runs $2,000 to $10,000 or more. Foundation settlement repairs using helical piers can reach $15,000 to $25,000 for a full perimeter installation. The cost of waterproofing, when weighed against the cost of the damage it prevents, is almost always the better investment.
Many professional contractors offer free inspections and financing options to help make the right solution accessible. Cost should not be a barrier to protecting your home.
Maintaining Your Waterproofed Crawlspace
A properly installed waterproofing system requires minimal maintenance. Annual inspections are recommended to confirm the system is functioning as intended.
Check the sump pump at least once a year by pouring water into the basin to verify the float switch activates and the pump discharges correctly. Inspect the vapor barrier for any tears, lifted seams, or areas where the liner has pulled away from the wall. Confirm that the dehumidifier, if installed, is draining properly and that filters are cleaned or replaced as needed.
After major storms or periods of heavy rain, a quick visual check of the crawlspace confirms that the drain tile system is handling the water load without issue. If you notice standing water, unusual odors, or any signs of structural movement, contact a professional promptly.
What to Look for in a Crawlspace Waterproofing Contractor
When hiring a crawlspace waterproofing contractor, look for a company with substantial hands-on experience in foundation and concrete work. The best contractors take an engineering-minded approach: they diagnose the actual problem first and build a solution around what the home genuinely needs.
Transparent pricing, free inspections, and a written warranty are reasonable standards to expect. Be cautious of contractors who recommend the same solution for every home without conducting a thorough inspection.
If your home has a crawlspace showing signs of moisture intrusion, structural movement, or persistent musty odors, contact a qualified local foundation repair specialist. A proper inspection is the first step toward a permanent, reliable solution.